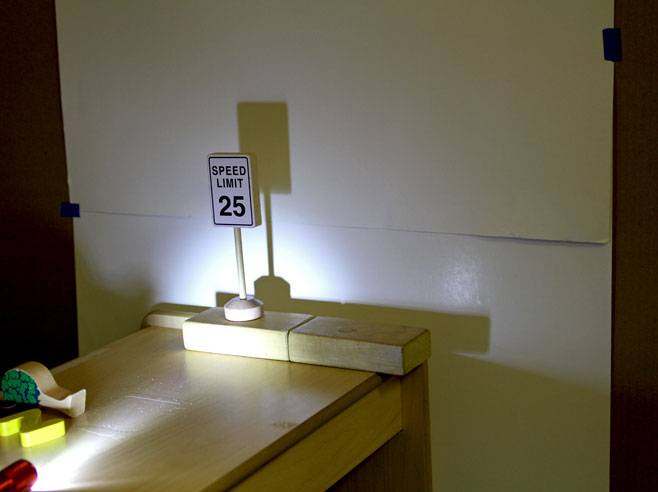
Children cast shadows on a “shadow wall,” using a flashlight, their hands, and small toys.
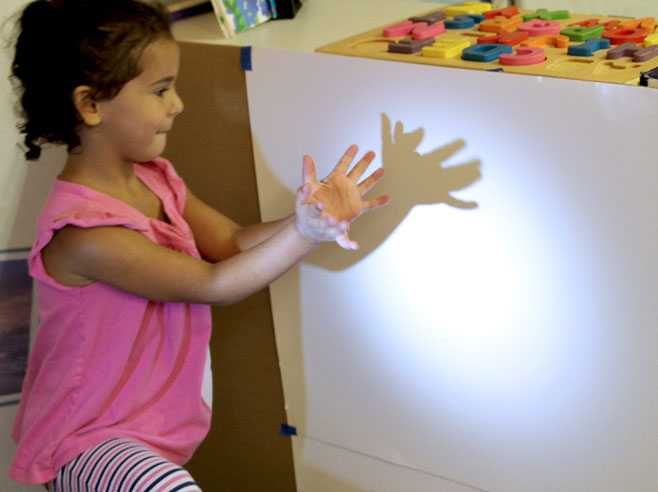
Using a flashlight, make shadows with just your hands.
Then add small objects and toys and a “stage” to the Learning Center.
Materials
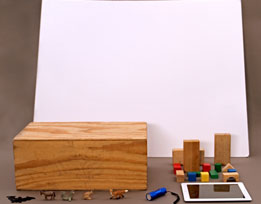
- A darkened area of the room
- LED flashlight
- Collection of small toys or other classroom objects
- Box or several blocks to create a “stage” for the objects
- Chart paper sheets or a white tri-fold display board to serve as a “shadow wall”
- Tape (if using chart paper as a shadow wall)
- Optional: iPad
- Optional: Cool Shadows tool in the digital Shadows Journal
- Optional: Mystery Shadows photo tool in the digital Shadows Journal
Preparation
- Set up small Shadow Centers. You might set up two Shadow Centers so more children can explore the materials at the same time. Each Shadow Center should have a flashlight and a shadow wall. For Lessons 2 and 3, add a few small toys or classroom objects and a box or several blocks to serve as a stage. (See photo of setup in slideshow.)
- If you wish, bring an iPad with you when you visit this Learning Center for conversation. Invite children to create a Cool Shadows photo or a pair of Mystery Shadows photos.
Directions: Lesson 1
Learning Center
- Invite 2–3 children to use each small Shadow Center. Have them use the flashlight to make shadows with their hands (and other parts of their body).
- As you circulate through the Learning Center, pause to join the children in their shadow explorations. Talk about what they are doing and what they notice. Encourage the children to listen to each other and build on each other’s responses. Possible discussion ideas:
- Tell me about the shadows you are making.
- Point to a shadow. How did you make that shadow? What is blocking the light?
- What surface is the shadow on?
- If we turn off the flashlight, do you think we will still see any shadows? Let’s try it and see.
- If you wish, bring an iPad with you when you visit the Learning Center for conversation.
- Invite children to take a Cool Shadows photo of their shadow. Encourage children to describe how they made the shadow.
- Or, invite children to create a pair of Mystery Shadow photos, one showing only the shadow and the other showing the object that made the shadow.
Directions: Lessons 2, 3
Learning Center
- For Lessons 2 and 3, children will have some familiarity with the Shadow Center materials and using their hands to make shadows. You can now add small toys and/or classroom objects and a stage for the objects.
- As you circulate through the Learning Center, pause to join the children in their shadow explorations. Encourage the children to listen to each other and build on each other’s responses. Possible discussion ideas:
- Tell me about the shadows you are making.
- Point to a shadow. How did you make that shadow? What is blocking the light?
- Can you make another shadow next to it? Under it? Over it?
- You may want to bring an iPad with you when you visit the Learning Center for conversation.
- Invite children to take a Cool Shadows photo of their shadow. Encourage children to describe how they made the shadow.
- Or, invite children to create a pair of Mystery Shadow photos, one showing only the shadow and the other showing the object that made the shadow.
