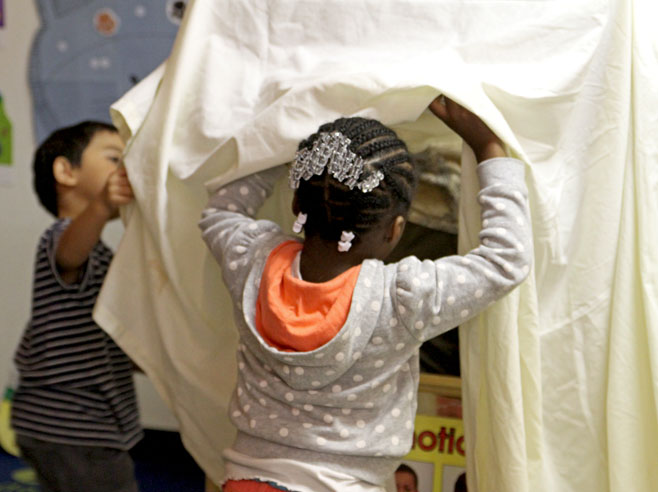
Children use their hands and shadow puppets to cast shadows on a sheet.
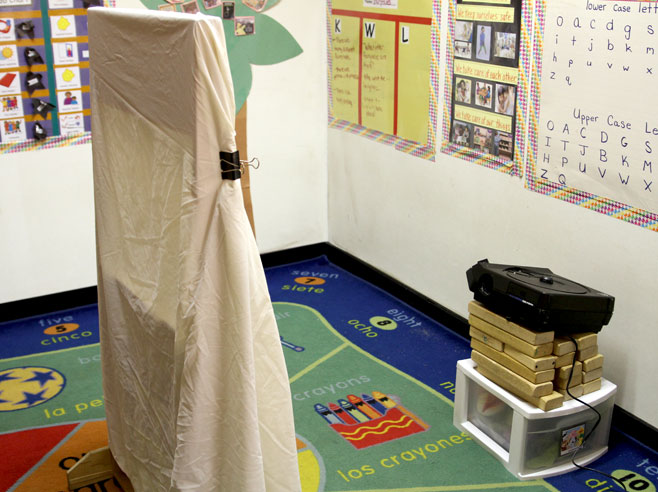
To make a shadow theater, drape a sheet over a classroom puppet theater.
Use binder clips or tape to stretch the sheet tightly across the opening.
Materials
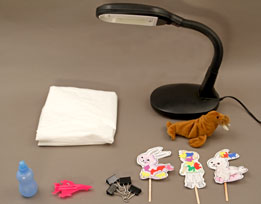
- LED lamp or a projector
- Large white sheet
- Shadow puppets made in the earlier Making Shadow Puppets activity
- Toys and objects to use as shadow puppets
- 4 large binder clips or tape
- Optional: 2 chairs
- Optional: puppet theater frame
Preparation
- Set up a Large Shadow Theater, using a white sheet and a bright LED lamp or projector. If you have a puppet theater frame in your classroom, simply drape a single-layer sheet over it and use binder clips or tape to stretch the sheet over the opening, so that there are no wrinkles.
- Another approach is to drape a sheet across two chairs that are a few feet apart. Use binder clips or tape to attach the sheet to the top and bottom of each chair, and the seat back and legs to stretch the sheet tightly.
- Place the lamp or projector behind the theater so that it shines on the sheet. The performers will hold up their puppets between the lamp and the sheet. The audience will sit on the other side of the sheet.
- Note: If setting up a Large Shadow Theater is difficult, children can do the shadow puppet activities equally well using the “shadow wall” setup described in the I Can Make Shadows activity in the Week 1 Learning Center.
Directions: Lessons 4, 7
Learning Center
- Invite children to use their hands, shadow puppets they have made, or any objects they find interesting to make shadows (such as a toy animal, crumpled up paper, and a milk container) and create a shadow puppet show. The objects must be held up between the lamp and the sheet surface. The audience will watch from the other side of the sheet. Children may want to use the puppets to act out a song, a conversation, or a simple story.
- Note: Shadow puppet shows can also be done using the simpler “shadow wall” setup described in the I Can Make Shadows activity in the Week 1 Shadow Learning Center.
- Encourage children to take turns performing and being the audience for other performers.
- As you circulate through the Learning Center, join the audience and enjoy the show! Engage the children “behind the scenes” in discussion about shadows. Possible discussions ideas:
- Show me where you need to hold your puppet so that its shadow appears on the sheet.
- What do you need in order to make a shadow?
- Predict what will happen to the shadow if you move the (object) closer to/farther from the light.
- Show me how you can change the size of the shadow. Can you make it bigger? Smaller? How did you do that?
- Can you put one object in front of another object? Which object is casting the bigger shadow?
- Can you turn your shadow puppet so it is thinner/wider? Can you make the shadow look like a thin line?
- Encourage the children in the audience to join you in shouting out directives to the puppeteers. For example, Make the train smaller! Now make the dinosaur thinner!
Directions: Lesson 9
Learning Center
- Invite children to use their hands, shadow puppets they’ve made, or any objects they can find to make interesting shadows (such as a toy animal, crumpled up paper, and a milk container), so they can create a shadow puppet show. The objects will be held up between the lamp and the sheet surface. The audience will watch from the other side of the sheet. Children may want to use the puppets or objects to act out a song, a conversation, or a simple story.
- Note: Shadow puppet shows can also be done using the simpler “shadow wall” setup described in the I Can Make Shadows activity in the Week 1 Shadow Learning Center.
- Encourage children to take turns performing and being the audience for other performers.
- As you circulate through the Learning Center, join the audience and enjoy the show! Engage the children “behind the scenes” in discussion about science ideas such as,
- Show me where you need to hold your puppet so that its shadow appears on the sheet.
- What do you need in order to make a shadow?
- Show me how you can change the size of the shadow. Can you make it bigger? Smaller? How did you do that?
- Can you turn your shadow puppet/object so it is thinner/wider? Can you make the shadow look like a thin line?
- Encourage the children in the audience to join you in shouting out directives to the puppeteers. For example, Make the (object) smaller! Now make the (object) thinner!
