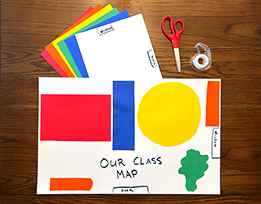
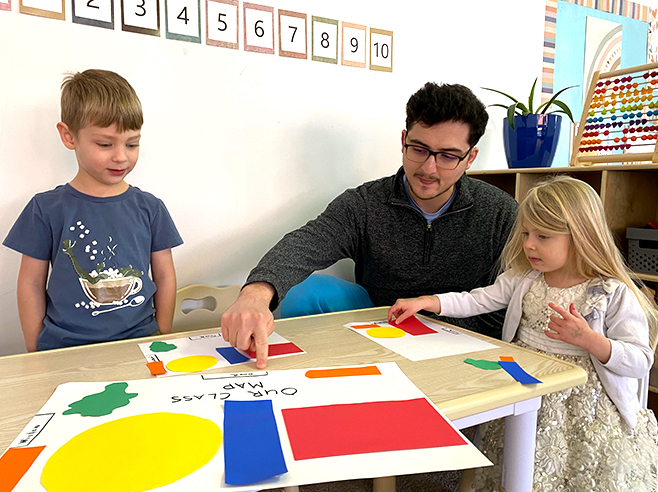
Children each create a smaller version of the classroom map.
Materials

- The big Classroom Map you made during Circle Time.
- Copies of the classroom map outline, showing where the door and the windows are. (You’ll draw this yourself.)
- Colored construction paper (to create cutouts of landmarks for children’s maps)
- Scissors
- Tape
- Markers or crayons (optional): Instead of using landmark cutouts, you may want to have children draw the landmarks on their maps.
Preparation
- This activity should follow the Map the Classroom activity. Children will be making smaller versions of the big classroom map.
- On an 8½ x 11-inch piece of paper, create an outline of the little classroom map, drawing where the door and the windows appear in your classroom. Photocopy it so you can give each child a copy.
- Just as you created simple construction paper cutouts to represent the landmarks on the big classroom map, you’ll create smaller cutouts of the landmarks for children’s maps. Use the same colors and shapes you used for the landmarks on the big map and cut them out. Make enough landmarks for each child.
- Or, instead of creating cutout landmarks, you could have children draw the landmarks right on the map with markers or crayons.
- When you’re done with the activity, you might find a way to laminate children’s maps so they can play with them later.
Directions
- Have a small group of children sit where they can see the big classroom map. Pass out the outline maps of the classroom. Place the cutout landmarks in front of them (or offer them the markers or crayons, if you want them to draw the landmarks instead).
- Compare the map outline you passed out with the big map. You might say, On the big classroom map, here’s where the windows and the door are. Can you find the windows and the door on your maps? Let’s turn our maps so that the windows and the door are facing the same direction as the windows and door on the big map.
- Point to the landmark cutouts. Choose one landmark and have children add it to their maps, making sure it matches the location on the big map. Help them to tape the landmark onto their maps.
- Have them add the other landmarks, one by one, to their maps. Discuss the location of each landmark in relation to the other landmarks.
- When they are done, have them compare the landmarks on their maps with the landmarks on the big map. Ask: What’s the same about the big and the little classroom maps? What’s different?
- Finish by having them compare the landmarks on their maps with the real objects in the classroom.
- Optional: You may want to laminate children’s maps so they last longer.
