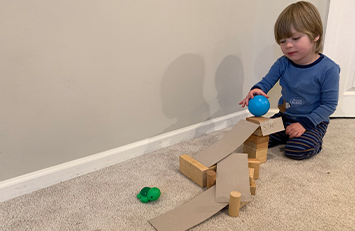
Build a pathway to move an object safely around a roadblock to a landing target. Will you go around, under, or over the roadblock?
20–30 minutes
Get Ready
Materials you will need:
- Large area to build the obstacle course
- 2 sheets of paper (to make “Start” and “Target” labels)
- 1 cardboard box lid (flatten one edge)
- Toy car or rolling object
- Roadblock obstacle materials (such as a pile of pillows, boxes, or stuffed animals)
- Ramp materials (such as cardboard or foam core sheets, large cardboard tubes, box lids)
- Tape (masking or duct tape to connect ramp materials)
Things to do before the activity:
- Cut some cardboard tubes in half lengthwise to create troughs.
- Make a “Start” label and place it in a high location such as a shelf, table, or back of a sofa. Put the car in the starting position. Make a landing target location using a box lid with one side flattened (the toy car will roll into the lid on that side). Tape it to the floor. Place a “Target” landing label in the box lid.
- Place a roadblock obstacle in the middle of the pathway area. (See suggested Materials in the Get Ready section.)
A character with a speech bubble and crab with a thought bubble.
Let's build an obstacle course!
I wonder what we will design!
Explore!
Step 1.
What is an obstacle? Put a chair in front of your child. Point out the chair is an obstacle that is blocking your child’s way. Work together to figure out how to get your child by the obstacle.
- Take turns naming obstacles you have seen in your neighborhood: for example, a tree blocking a bike lane, a trash can blocking a sidewalk.
Step 2.
Look at the area where you will be building the pathway. Point out that the area stretches from the start to the target locations. Talk about building a pathway that connects the start location to the target location.
- Look at the space you have to work with.
- Point out that you need to build a pathway that will fit in the space.
Step 3.
Identify the problem. Place the toy car on the start location. Talk about how to get the car safely to the target area. Notice there is an obstacle blocking the way.
- Point out that the toy car will need to get by the obstacle.
- Let’s think about how we can get the car safely past the (obstacle).
Step 4.
Brainstorm a solution. Look at the ramp materials you have available. Discuss ideas on how to use the materials to build the pathway with your child.
- What materials will make good ramps? Why?
- Point out that the roll of tape can be used to connect materials to make long, straight pathways or pathways that change direction.
Step 5.
Make a plan. Together, decide how you will use ramps or flat surfaces on your pathway. Consider how to position your pathway so the toy car is able to get past the (obstacle).
- Point out that the car will move faster on a ramp than on a flat surface.
- How should we make the pathway so the toy car will move (over) the (obstacle)?
Step 6.
Build the pathway. Work together to build and test the pathway. If the pathway does not work, try and fix it. Change one thing at a time and test it after each change.
- Notice how the (obstacle) can change the motion or direction of the toy car.
- What happened when the toy car hit the (obstacle)? Let’s fix the pathway.
Review!
Look at the pathway you built.
- Discuss the problem you were solving.
- Did the pathway we designed solve the problem? How do you know?
- Describe a solution that did not work. How did we fix it?