Children design a sled track made of ramps and flat surfaces to move a “summer sled” through a town obstacle course.
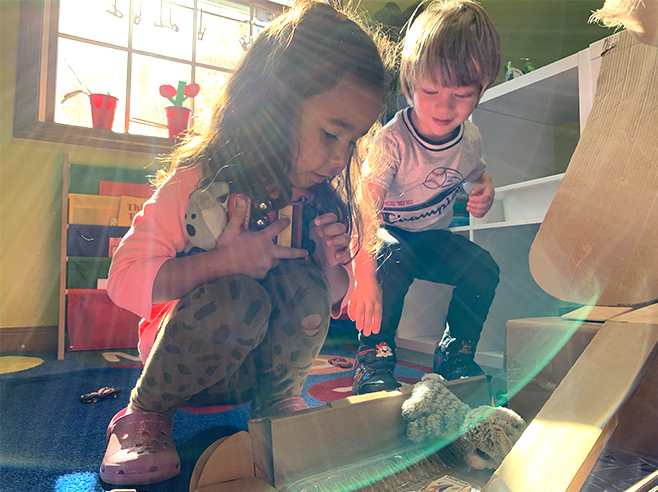
Children design a track that will help a sled travel safely through a town.
Brainstorm design ideas. How will the sled move from the top of a hill down to the center of the imaginary town?
Materials
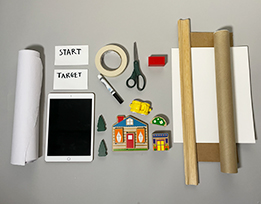
- Chart paper to record children’s ideas
- 2 index cards (labeled “Start” and “Target”)
- iPad or cell phone camera
- Marker
- Masking tape
- Scissors (for teacher use)
- “Sled” object, such as a block, empty juice carton, sliding toy (small enough to fit on the sled track)
- Objects for building the town and obstacles, such as toy trees, cars, and houses; blocks and cardboard boxes for buildings and walls; pillows for bushes; cardboard tubes for trees and utility poles; etc.
- Ramp materials, such as poster-size cardboard or foam core sheets, long cardboard tubes from wrapping paper rolls, and cove molding
Preparation
- You might need to plan to do the activity in three sessions throughout the day.
- At Circle Time: Introduction, children will EXPLORE the problem (how to design a track to safely move a sled from the top of the hill to the center of town).
- At Guided Small Group time, children will PLAN, CREATE, and IMPROVE and document their sled track designs.
- At Circle Time: Wrap-Up, children will SHARE and communicate how they created and revised their sled track solutions.
- Make a variety of materials available for children to create a town that includes roads and a few obstacles, such as a building, tree, house, river, etc.
- Cut materials to use for the sled track. Make ramps of different lengths so children can tape them together to make longer tracks or to change the track’s direction.
- Cut some cardboard tubes in half lengthwise, to make troughs.
- Tear lengths of masking tape for children to use to tape tubes to surfaces or to other tubes.
- Make a “start” and “target” label.
- Prior to Circle Time: Wrap-Up, review pictures you took during Guided Small Group time and select a sample picture(s) that represents each group’s final design. Also select one or two iterations that did not work, to discuss during Circle Time.
- Tips for Teaching Engineering:
- Acknowledge all ideas. Every idea is worth trying: That’s a great idea! Let’s try it!
- Allow children to fail or “get stuck.” This is when they get to figure out why their approach did not work and how they can revise it: Why do you think this structure didn’t work? What can you do to change it? Let’s test it!
- Encourage children to share and build on one another’s ideas. This helps them become communicators and collaborators in solving problems: I like how you used (child’s name)’s idea and added your own idea to it!
Directions: Lesson 11
Circle Time: Introduction
- EXPLORE. Review what children know about force, gravity, friction ramps and pathways. Review what they’ve learned over the weeks. Possible discussion ideas:
- What makes things move? How would we move something on the ground? What makes something move down a ramp? What makes things stop moving?
- Will an object move farther down a ramp that is steep or gentle?
- Identify the problem. Have children imagine they are engineers. We want to design and build a track for the sled to travel on through our town. Our town may have obstacles such as trees, buildings, and rivers that are blocking the way. We need to figure out how our sled track will get by these obstacles so a sled rider can safely get to the center of town.
- Invite children to share ideas about other obstacles they might have in their town.
- Have children brainstorm ideas to solve the problem. Possible things to consider:
- How to build a track that goes over, under, between, or around each obstacle
- How to make sure the sled does not fall off the track
- How to help the sled slow down near the finish line
- Draw attention to the materials. Ask children to describe the materials they could use to build their track. Write down their ideas so you can revisit them in Guided Small Group time. Possible discussion ideas:
- Will your track have flat surfaces, ramps, or both?
- Will your track use smooth or rough textures?
- How can you make ramps or surfaces longer?
- What materials will help keep cars from falling off the track?
- Tell children they will plan and build their tracks in small groups.
- Note: Be flexible in allowing children to use other classroom materials if they come up with a solution using these additional materials.
Guided Small Group
- Have children create an imaginary town. Remind them that the town should have a few obstacles, such as trees, buildings, and rivers, blocking the way. Encourage them to choose a high “hill” location, such as a bookshelf, where the track will begin. Write down or draw children’s ideas.
- Review the materials and children’s ideas from Circle Time and ask children if they have any more ideas about which materials to use for their track. Add these to the previous list.
- PLAN a solution. Use children’s ideas to brainstorm how to design the sled track. Encourage them to include:
- Flat surfaces and steep and gentle ramps
- A path that turns to get around obstacles
- A path that ends in the sled’s target location
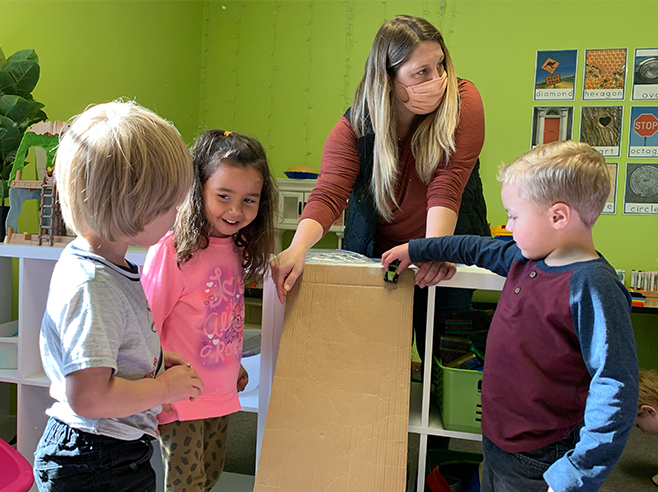
- CREATE the sled track. Have children use the materials and brainstorming ideas to build the track. Assist them in taping ramps and flat surfaces together to make a path that goes over, under, around, between, or next to the obstacles.
- IMPROVE. Test the solution! Have children move the sled on their track to test whether it can arrive safely at the target destination. Then have children determine whether their design solves the problem. Possible discussion idea:
- Was your design a good solution? Why or why not?
- Improve it. If the design is not working, have children revise it based on the results of the test. Then test the revised design. Change one thing at a time. Possible discussion ideas:
- Where did the sled get stuck? Where did it fall off the track?
- Did the sled slow down at the end?
- How can we change that part of the track?
- How can you make your sled track go (between) the (houses)?
- Document the final solution. Use your iPad or cell phone camera to take pictures of different design solutions. Be sure to capture iterations that worked and those that needed to be revised. Children will share their designs and solutions with the whole class in the Wrap-Up activity.
Circle Time: Wrap-Up
- SHARE. Communicate. Review the photos you selected from children’s explorations in Guided Small Group time. Have each group share their track design with the whole class. Encourage children to compare different groups’ solutions. Encourage them to use positional words to describe how they tested and revised their design. Possible discussion ideas:
- Why did that solution not work? How did you change it to make it work?
- How did the (obstacle) change the movement of the (object)?
- Why did you use a flat surface near the end?
- How did you make the sled go around the corner without falling off?
- Did the final design solve the problem? Why or why not?
Directions: Lesson 12
Learning Center
- Invite children to continue to continue to explore how to use the ramp materials to get the sled safely from the start location to the landing target location without hitting any obstacles. Ask children what they did when they encountered obstacles.
- As you stop by this center, engage children in conversation describing the tracks and how the sled moves on flat and ramp surfaces. Encourage the use of positional language as students describe how the sled moves around the obstacles. Use similar prompts as above.
