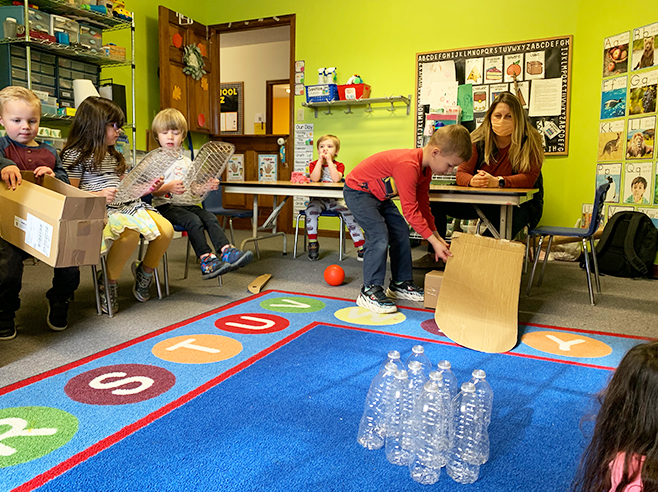
Children design a bowling game that will fit in a classroom space. They observe how a ball moves down different lane designs. Can you make the ball go faster? Slow down? Stop?
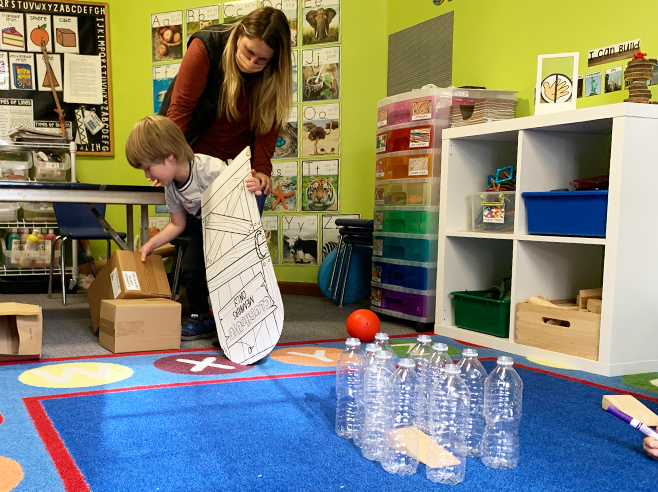
Explore materials that you can use to design a bowling lane to fit in the classroom.
Let’s create our bowling lane and test it to see if it is a good solution.
Materials
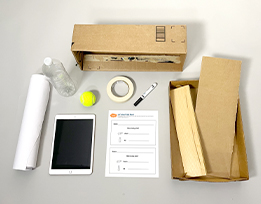
- Chart paper
- Ball for each group (2.5″–5″ in diameter)
- iPad or cell phone camera
- Let’s Bowl Tally Sheet (at least 1 for each child) (PDF)
- Marker
- Masking or duct tape
- 10 1-liter plastic water or other drink bottles (clean)
- Lane surfaces of varying lengths, such as flat cardboard sheets, large box lids, wood planks
- Ramp props, such as long blocks, books, or boxes
- Optional: Online images and/or video of children bowling to show 1) the length of an actual bowling lane, and 2) a “bowling ramp” device used to help children start the heavy ball rolling
- Optional: Cardboard strips for side “bumpers”
- Optional: Projector to view bowling images and videos
Preparation
- Plan to do the activity in different locations throughout the day.
- At Circle Time: Introduction, children will EXPLORE the problem (space in the classroom) and PLAN the bowling lane design.
- At Guided Small Group, children will CREATE, IMPROVE, and use their bowling lanes.
- At Circle Time: Wrap-Up, children will SHARE their designs and explorations.
- Find and clear a space in the classroom large enough for children to build a bowling lane. Place the bowling lane materials and pins in the area.
- Make a sample bowling ramp and try it out so you can anticipate problems that might arise during children’s explorations. Make sure the “lane” pieces are not too large for the space.
- Fill ten 1-liter plastic bottles halfway with water or sand. (See #14 Note below.)
- Adjust the water/sand levels in the bottles to make sure they are not too easy or too difficult to knock down.
- Set up a few “bowling pin” bottles in the Circle Time area for modeling how to bowl.
- Make copies of the Let’s Bowl Tally Sheet (at least 1 for each child).
- Place the bowling lane materials and pins in the bowling area.
- Set up an iPad or projector to display online bowling images and videos.
- Circle Time: Wrap-Up: Review videos from small group sessions. Select one video that represents each group’s final design and one iteration that did not work.
- Note: An actual bowling game uses ten pins. Feel free to adjust the number of pins to enable children’s success.
- Tips for Teaching Engineering:
- Acknowledge all ideas. Every idea is worth trying: That’s a great idea! Let’s try it!
- Allow children to fail or “get stuck.” This is when they get to figure out why their approach did not work and how they can revise it: Why do you think this structure didn’t work? What can you do to change it? Let’s test it!
- Encourage children to share and build on one another’s ideas. This helps them become communicators and collaborators in solving problems: I like how you used (child’s name)’s idea and added your own idea to it!
Directions: Lesson 7
Circle Time: Introduction
- EXPLORE: Ask children if they have ever been bowling. Explain and model the game: players take turns rolling a ball on a flat surface (a lane) to knock down bowling pins. Possible discussion ideas:
- How do you make the ball move down the lane?
- What happens when the ball hits the pins?
- Can you make the ball move faster or slower? How?
- Identify the problem. Have children notice the length of the bowling lanes in the online bowling images/video. Introduce the problem: We want a bowling lane to use in the classroom. Let’s figure out how to make a bowling lane that can work in the small classroom space.
- Have children brainstorm ideas to solve the problem. Talk about things you will need in the bowling area. Write down children’s ideas, such as:
- a lane that fits in the classroom space
- an area at the end of the lane for the pins to be set up and knocked down
- space for the child bowling to move around
- Draw attention to the materials. Ask children to describe the materials they can use to build the bowling lane. They might include:
- a smooth, steep surface
- a marked-off area for the pins
- PLAN a solution. Use children’s ideas from earlier discussions as you plan the bowling lane design. You might want to make a drawing for your plan. The plan might include:
- a location for the bowling lane and the pins
- space where the child bowling can move around
- something to keep the ball from rolling off the lane (such as side “bumpers”)
- Tell children that you will save the notes and drawing plan to use in small groups. Explain that in small groups they will be creating their bowling lanes and go bowling.
Guided Small Group
- Review the problem and children’s notes and drawings from the Circle Time activity. Possible discussion ideas:
- Where will you put the end of the lane? Why?
- How can you stop the ball from rolling into the other activity spaces in the room?
- Will the ball move faster on a smooth (floor) or rough (carpet)? Why?
- Will ball go farther on a flat, gentle, or steep surface? Why?
- CREATE the bowling lane. Have children use the materials and their brainstorming ideas to build the bowling lane. Encourage them to share ideas as they work together. Possible discussion ideas:
- How will you make a longer lane?
- How will you make the ball move fast?
- How will you make sure the pins are always lined up with the end of the lane?
- IMPROVE. Test the solution! Have children test the bowling lane to determine whether or not their solution works. Take videos of children’s testing their solutions.
- Was your design a good solution? Why or why not?
- Does it allow you to bowl in the classroom?
- Improve it. If the design is not working, have children revise it based on the results of the test. Guide children to change only one thing at a time. Possible discussion ideas:
- Does the lane end at the pins?
- Why did the ball stop? How can you make it move slower? Faster?
- What happens if we make the ramp steeper? Will the ball roll farther?
- Document the final solution. Take videos of the design solutions with your iPad or cell phone. Capture iterations that worked and those that needed to be revised.
- Distribute the Let’s Bowl tally sheets. Help children write their name on the sheet.
- Have each child take turns rolling the ball down the lane two or three times. Encourage children to describe what is happening. Possible discussion ideas:
- What happened when the ball hit the pins?
- Were more pins knocked down when the ball was rolling faster or slower?
- Did the ball roll farther on a steep or gentle ramp?
- After each child has bowled, fill out the tally sheets together.
- Count the number of pins knocked down.
- Dictate, draw, or write to record how many on their tally sheet.
- Repeat with pins still standing.
- Tell children they will share their bowling lane videos and compare their bowling results during Wrap-Up time.
Learning Center
- If you are able to leave the bowling materials in place, invite children to continue to design lanes, explore how the ball moves on lanes of different designs, and observe what happens when the ball hits the pins.
- As you stop by this center, engage children in conversation. Have them describe the motion of the ball, the surface texture of the ramps (how it affects the distance the ball rolls), and the incline of the ramps (how it affects the speed at which the ball rolls). Use similar discussion prompts as those used in the Circle Time and Guided Small Group activities.
Circle Time: Wrap-Up
Review the videos you selected from children’s explorations in Guided Small Groups.
- SHARE. Revisit children’s final bowling lane designs. While watching the videos, have each group share their lane design. Encourage them to describe how they tested and revised their design. Possible discussion ideas:
- How did you make the ball go fast? Slow?
- Did the final bowling lane solve the problem? Why or why not?
- View an unsuccessful design. Why did that design not work? How did you change it to make it work?
- Distribute children’s tally sheets. Have children compare the results of their bowling games.
- Who had more than four pins standing? Who knocked down fewer than five pins?
- Did you knock down the same number of pins as one of your classmates?
- Who had the same number of pins standing and knocked down?
Directions: Lesson 8
Learning Center
- If you are able to leave the bowling materials in place, invite children to continue to design lanes, explore how the ball moves different lane designs, and observe what happens when the ball hits the pins.
- As you stop by this center, engage children in conversation. Have them describe the movement of the ball, the surface texture of the ramps (how it affects the distance the ball rolls), and the incline of the ramps (how it affects the speed at which the ball rolls). Use similar discussion prompts as those used in the Lesson 7 Circle Time and Guided Small Group activities.
