Children decorate a paper shape with collage materials and/or use a hole puncher or scissors to add holes. They examine its shadow, then tape it to a sunny window and note how the shadow moves.
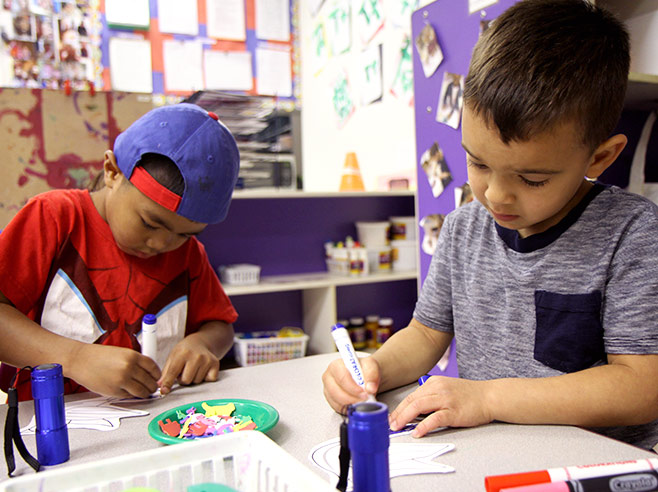
Decorate paper bird cutouts or use plain paper to create a Shadow Maker.
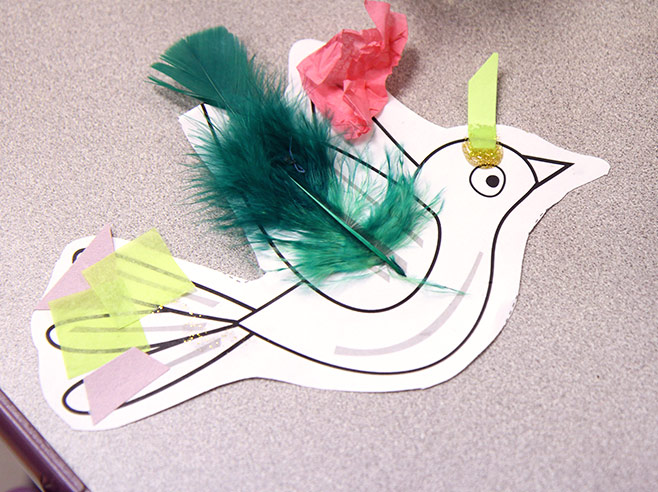
Look at those beautiful decorations on the bird!
Materials
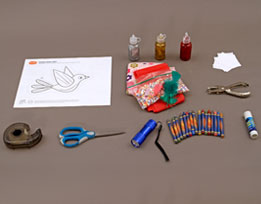
- Cardstock or copy paper
- Collage materials, such as feathers, strips of tissue paper, or other lightweight materials
- Crayons and/or markers
- Flashlights
- Hole punchers
- Kids’ scissors
- Shadow Maker (PDF)
- Square pieces of paper (about 5 x 5 inches)
- Sticky notes
- Tape, glue sticks
- Optional: cardstock paper
- Optional: colored cellophane or acetate
- Optional: sunny window
Preparation
- Print copies of the Shadow Maker PDF onto cardstock paper if possible. You may wish to cut out the bird shape for children to decorate.
- Note: If a sunny window is not available, string a “clothesline” in the room. Have children hang their Shadow Makers on the string and move the flashlights to change the shadow positions.
Directions: Lesson 3
Learning Center
- Children can create Shadow Makers from the bird cutout in the PDF and/or from the square pieces of paper. Encourage children to fold and cut holes in the square pieces of paper to make “snowflakes.” They can also use scissors and hole punchers to make holes in the bird cutout.
- If you wish, provide colored cellophane or acetate to tape over those holes.
- Adding feathers and other collage materials to the bird and snowflake can also add interest.
- Students can use flashlights to cast shadows of the Shadow Makers on a flat surface such as the floor or wall. Then they will tape their Shadow Makers to a sunny window and look for the shadows to appear! Make sure to write the name on each child’s Shadow Maker.
- After the Shadow Makers have been taped to a sunny window, engage the children in shadow science talk. Possible discussion ideas:
- Where is the light coming from that is making our shadows? Review that the sun is a natural light source.
- Can you find the shadow of your bird/snowflake? How do you know that’s your shadow?
- What color is your bird/snowflake? What color is the shadow? Why are they different colors? How are the bird/snowflake and its shadow the same?
- You have some nice (feathers) on your Shadow Maker. Can you see the (feathers) in the shadow?
- Do you think that the shadow of your bird/snowflake will stay in the same place all day long? Let’s write your name on a sticky note and put it on the (floor/wall) where the shadow is now. With children, check back a few times throughout the day to see if the bird/snowflake shadows stay in that spot all day.
- After all or most of the class has had a chance to cycle through this Shadow Maker activity at the Learning Center, you may want to continue this discussion during a Circle Time. Encourage children to share their observations and discoveries with the bird and snowflake shadows, and to think about why the shadows appear and disappear.
